Monday, 17 January 2011

OLIVE CHEESE BREAD

This bread is absolutely addicting.  I have made it countless times since I picked up a copy of This Cookbook.  I will make spaghetti (which I have never been a huge fan of) just so I can make this bread to eat with it.  Also, I seriously HATE olives.  You will never see me eating olives, if they are on my salad, I pick them off or if they are in dips, I will pick them out, but for some reason I LOVE them on this bread.  Maybe it is because I chop them so small that I can't taste them?  Or maybe it is because the other flavors are so incredibly delicious that it makes me forget there are olives in it?   

Whatever the reason, thank goodness, because I would be missing out if I would have chosen to never make this bread.  From one "Olive Hater" to another "Olive Hater" don't be afraid of this bread.  I promise if you just give this a try once, you will be hooked.  I have changed the recipe quite a bit from the original to match my taste.  The original recipe uses pimiento-stuffed green olives, but I prefer just the plain pimientos.  I also added some Parmesan cheese and garlic powder to give it a little better taste.        
Olive Cheese Bread
slightly adapted from This Cookbook

1 (14.5 oz.) can black olives, drained
1/4 c. pimientos, drained
1 cube butter, soft
1/2 c. Mayonnaise (no subs)
8 oz. Monterey Jack Cheese, grated
1 c. Parmesan Cheese blend, grated
salt and pepper
garlic powder, to taste
1 loaf french bread

Finely chop the black olives and pimientos and add to a mixing bowl.  Add the butter, Mayonnaise, Monterey, Parmesan blend, salt, pepper and garlic powder; stir well to combine.  Slice french bread in half lengthwise.  Spread both halves evenly with olive/cheese spread.  Bake at 375 degrees for 20-25 minutes or until the cheese is melted and beginning to brown.  Serve with spaghetti or lasagna.  

Saturday, 15 January 2011

ST. PATRICK'S PISTACHIO CAKE

I usually only make this cake for St. Patrick's Day (hence the name), but I was craving it, so I had to make it now, but hey, now you have an idea for a fun green cake two months in advance!! I decided to try it as a bundt cake this time instead of the usual cupcakes and to even make things quicker I used a store bought frosting instead of making homemade.  This cake is extremely light and fluffy which is my favorite type of cake.  It has a yummy flavor and it stays fresh for several days and it does not have to be refrigerated.  (I opened my oven a few minutes too soon and a ring around the cake sunk, that it why the inside is not completely flat)   


St. Patrick's Pistachio Cake
adapted from the: The Cake Mix Doctor

1 White Cake Mix
1 small box pistachio instant pudding
1 c. lemon-lime soda
1 c. vegetable oil
1/4 c. Irish cream coffee creamer, optional
3 eggs
green food coloring, optional

Preheat oven to 350 degrees.  Grease and flour a bundt pan or line 24 muffin cups with paper liners.  Place all ingredients in a large bowl.  Blend on low for 30 seconds.  Increase speed to medium and mix two minutes more.  Bake about 50 -55 minutes for a bundt cake or 18-22 minutes for cupcakes.  Cool completely.  Frost with desired frosting.      

Tuesday, 11 January 2011

JENN'S HAM CHOWDER

My father-in-law, Bob, made some yummy ham chowder for us last week and I thought it was the greatest idea.  I honestly had never eaten it before.  What a great way to use up leftover ham.  I had some in my freezer that I needed to use.  So, last night, I decided to create my own recipe for this chowder.  I used the same vegetables that I remembered in Bob's and let me tell you, I absolutely loved it.  I really wish that I had some more to eat for dinner tonight.  This really is my new favorite way to use up leftover ham from the holidays.  By the way, this was the first time I had used frozen leftover ham and just to let you know, it tasted the exact same as it did the first night we ate it.  

I like my chowder super thick and chunky, so add less veggies if you don't like it really chunky.  Also, I used 1% milk and trust me, it was super smooth and creamy, so there is no need for all those extra calories by adding cream.  Serve with bread and you will be in heaven! 

**Update 10/21/12 - I have made this countless times since this post and it is a family favorite**
Jenn's Ham Chowder
From: Jenn@eatcakefordinner

1 Tbl. Butter
1 Tbl. Extra Virgin Olive Oil
1/3 c. onion, finely chopped
3 carrots (about 1 1/2 c.), chopped
2 large russet potatoes, peeled and diced
garlic, minced
1 1/2-2 c. leftover spiral ham, chopped
1 can low-sodium chicken broth
4-5 c. milk (I use 1%)
4 Tbl. cornstarch dissolved in 1/4 c. water
1 can corn, drained
2 tsp. Italian seasoning
salt & pepper
1 1/2-2 c. Cheddar cheese, grated

Heat butter and oil in a large pot over medium heat.  Add the onions, chopped carrots and diced potatoes.  Saute for about 10 minutes or until onions and potatoes are slightly translucent.  Add the garlic and ham and cook another minute or so.  Add one can of chicken broth and bring up to a boil.  Boil until potatoes and carrots are tender.  Add milk and stir to combine.  Dissolve cornstarch in water and add to pot.  Add the can of corn and season with Italian seasoning, salt and pepper (you might not need salt depending on how salty your ham, broth and corn are).  Stir to combine.  Cook until thickened, stirring occasionally. Last, add shredded cheese and stir until smooth and melted.  Serve with sliced baguette.  Serves: 5-6.          

Saturday, 8 January 2011

TIE-DYE SUGAR COOKIES

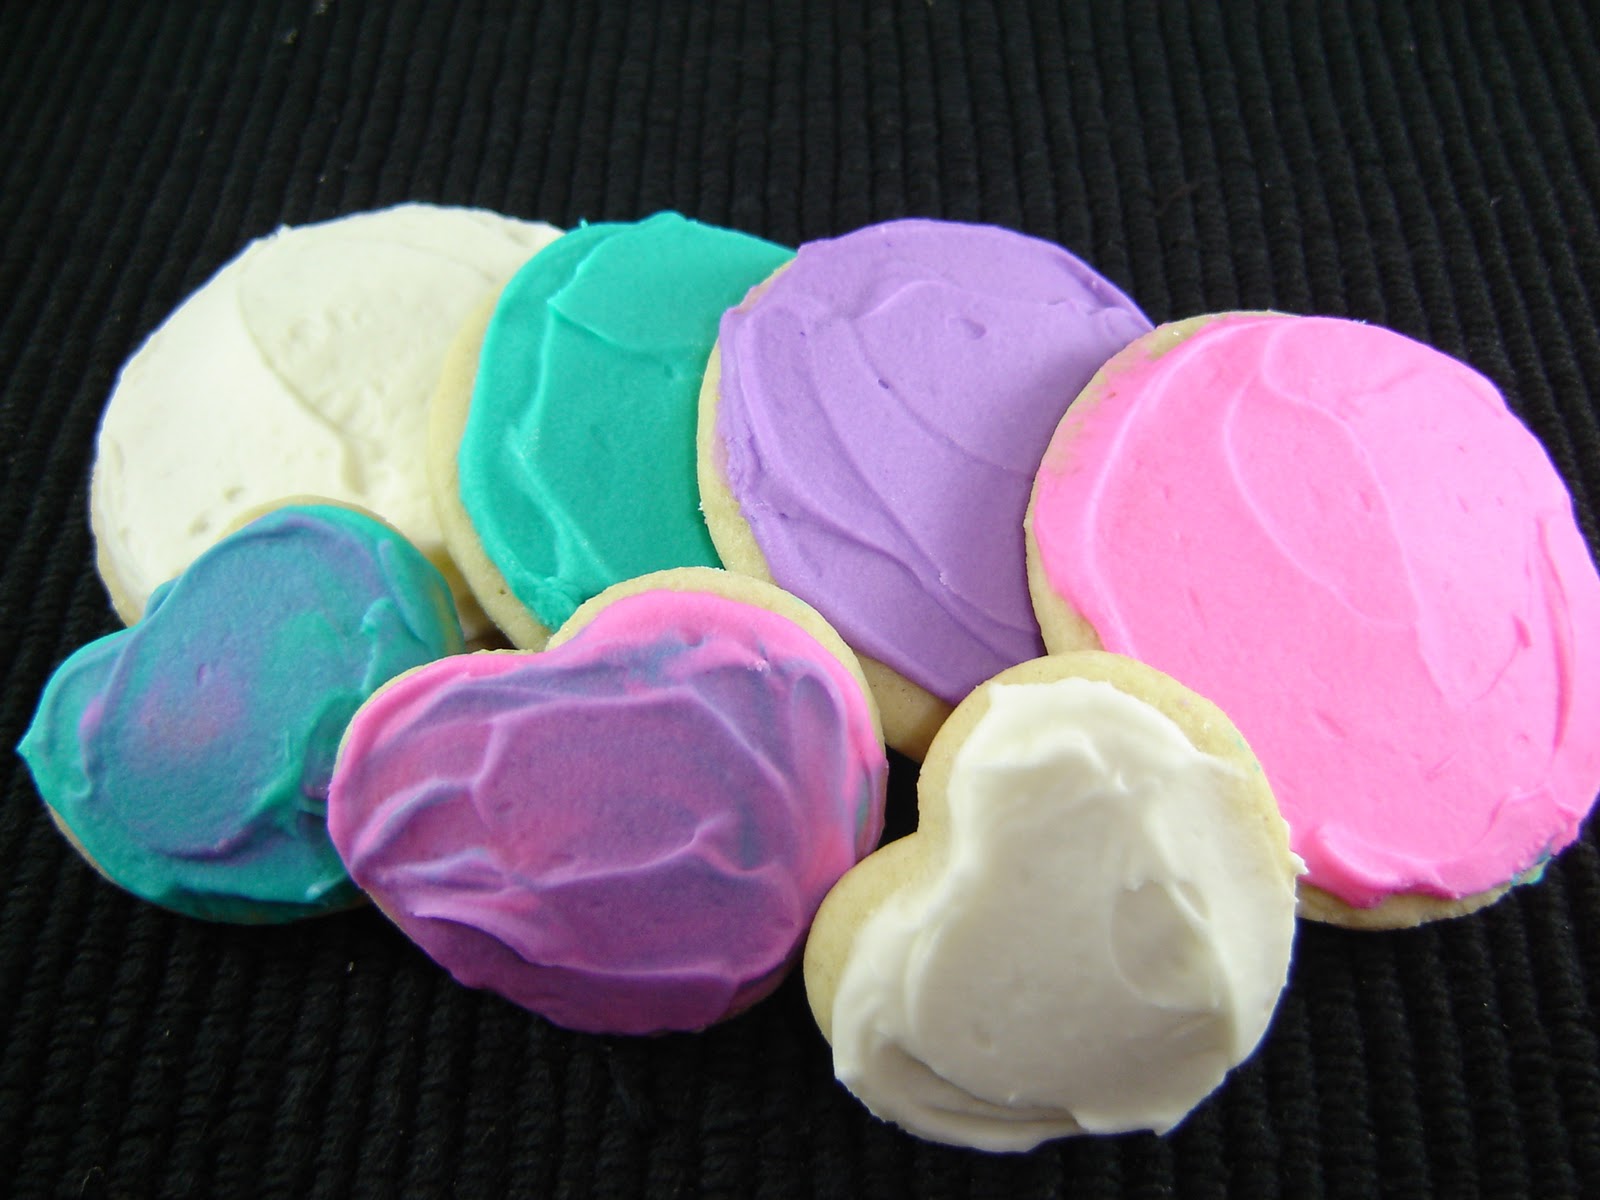
If I had to pick a favorite cookie, it would be a sugar cookie with frosting, no doubt about it.  I recently posted my new favorite sugar cookie recipe, but I made them with glaze that time and I wanted to try them with frosting to see which way I liked better.  I had also seen a really cool way to make tie-dye cookies with royal icing over at The Hungry Housewife, but I had never tried royal icing, so I wondered if it would work with the frosting I wanted to try on my cookies?  As you can see by my pictures, they definitely did not turn out like Leslie's, but oh well, it was still fun to try.  If I would have made my frosting a little thinner and piped it on the cookie in a thinner swirl, it probably would have worked better.  Next time, I will try the royal icing.  

For the frosting on my cookies, I used a recipe from my friend, Andrea.  In my opinion, it is a cross between an icing and a frosting.  I have made it probably 8 or so times since she gave me the recipe.  I think it goes perfect with sugar cookies.  Don't let the sour cream scare you, because you really can't taste it.  I loved how these cookies tasted with the frosting.  They are super good with both the icing and the frosting, so which ever way you chose to make them, you won't be disappointed.  I think they deserve the title "Ultimate Sugar Cookies"!!!   
1.  Make a swirl with any color
2.  Make another swirl with a different color
3.  Followed by a 3rd swirl with another color
4.  Then make a 4th swirl with plain white
5.  Then, take a toothpick and starting in the middle, pull out to the end of the cookie.  Continue around the whole cookie.  Then, pick up your cookie and shake it back and forth to smooth out your icing. Fill in any gaps using your toothpick.  
This is the finished look.  Again, if you use a thinner frosting or royal icing, it would work a lot better than mine did.  
Or, just frost them with plain colors 

Tie-Dye Sugar Cookies

1/2 recipe of The Best Sugar Cookies
(1/2 batch yields 28 regular round cookies and 18 small hearts)
1 batch Sour Cream Frosting
Food Coloring: Any three colors  
Toothpick

1/2 Batch Sugar Cookies
1 c. butter, softened
1 + 1/8 c. sugar
2 Lg. eggs, lightly beaten
1/2 c. milk
3 + 3/4 + 1/8 c. flour
1/2 tsp. baking soda
1/2 tsp. baking powder
1/4 tsp. lemon flavor
1/4 tsp. salt
1/8 tsp. nutmeg
1/2 Tbl. honey

Cream together butter and sugar.  Add eggs and then milk.  Stir in remaining ingredients.  Dough will be soft and sticky.  Place dough on a well floured surface.  Knead in just enough flour to make dough workable.  Dough will be very soft.  It is best to knead with a rolling pin motion so you have a smooth surface and you will not get cracks on top of your cookies.  Gently roll out to 3/8 inch thick.  Cut into desired shapes and place on baking sheet lined with parchment paper.  Bake at 325 degrees for 10-12 minutes (mine took 13) or until edges barely start to change colors.  Cool. Yields: 28 regular round cookies and 18 small hearts


Sour Cream Frosting:
adapted from: Andrea L.

1 cup (2 cubes) unsalted butter, softened
4-5 Tbl. sour cream
5-6 cups powdered sugar
2 tsp. vanilla
pinch of salt

Beat butter until light and fluffy; add 3 Tbl. sour cream.  Add powdered sugar, one cup at a time, adding more sour cream as needed (The sour cream replaces the milk, so if you need the frosting to be thinner, just add more sour cream).  Add vanilla and salt and beat until light and fluffy and reaches desired consistency.  Frost or pipe onto cooled cookies.  You must keep the finished cookies refrigerated, because of the sour cream.   

*If you would like to try the tie-dye version.  Divide frosting into four bowls.  Add food coloring to three of the bowls and leave one plain white.  Add each color to four separate zip-lock bags and barley snip off the corner of the bag.  Pipe onto cookies as described above.  

Thursday, 6 January 2011

MY TOP TEN MOST VIEWED RECIPES SO FAR

I thought it might be fun to see what the top viewed recipes are on my blog.  This is since September 2010 to today. Some might surprise you and some might make a little more sense.  My #1 viewed recipe shocked me, but it is one of my new favorite recipes.
  
#10 top viewed recipe is Red Velvet Bars

#9 top viewed recipe is Key Lime Pie Bars

#8 top viewed recipe is Phat Cow Fudge

#7 top viewed recipe is Fabulous French Bread

#6 top viewed recipe is Homemade Funfetti Cupcakes

#5 top viewed recipe is Red Velvet Cheesecake Cake

#4 top viewed recipe is Slow Cooker Pork Chops

#3 top viewed recipe is Eggnog French Toast
 

#2 top viewed recipe is Easy Orange Rolls

#1 viewed recipe is Pumpkin Cornbread

Tuesday, 4 January 2011

15 MINUTE CREAM BISCUITS

One of my favorite things about the end of a year/start of a new year is that you get to recap what happened during the year.  I love reading the "Best Of" lists.  Example: Top 10 movies, Books, Cars, Restaurants, etc. . . . And sometimes I forget about all the yummy recipes I found on Blog's throughout the year, so it's nice to get a recap of the best.  I found this biscuit recipe over at Real Mom Kitchen.  It was her #1 bread recipe from 2010.  Well, who can pass up a #1 recipe?  Not me of course, especially when I have a whole carton of whipping cream in my fridge that needs used up and this recipe calls for 1 1/2 cups (not a whole carton, but it's a start).  These come together really quick.  The first time I made them, I wished I would have rolled them out thicker, because they didn't rise too much in the oven, so they looked a little flat.  Then, I made them a second time and added an extra teaspoon of baking powder and they actually looked like a biscuit that time.  I thought they tasted so yummy with a little honey on top.  Plain, they don't have too much flavor since there isn't any butter in them, but they were perfect with the honey.  They are really light and fall apart pretty easy.  So, you don't want to pick one up and go eat it on the couch, because there will be crumbs everywhere!  Great way to use up all that leftover whipping cream from the holidays.  

This was my 1st attempt at these!

This was my 2nd attempt!  Looks a lot better, huh?

15 Minute Cream Biscuits
adapted from: Real Mom Kitchen

2 c. flour
2 1/2 tsp. sugar
2 tsp. baking powder (2nd time I used 3 tsp.)
3/4 tsp. kosher salt
1 1/2 c. heavy whipping cream, divided

Preheat oven to 425 degrees.  Combine flour, sugar, baking powder and salt.  Stir in all but 1/4 cup of the cream.  Take a handful of mixture and place on work surface.  Add remaining cream to dry bits in bowl and add to mixture on counter.  Knead briefly until comes together.  Shape into a long rectangle and cut into 8 square biscuits or cut into circles with biscuit cutter (I got 6 round ones).  Place onto a lightly greased cookie sheet and bake 15-18 minutes (mine took 17 min.) or until done.  Optional: brush tops with melted butter before baking.   

Sunday, 2 January 2011

SLOW COOKER PORK CHOPS

Happy New Year.  It's 2011 already, can you believe it?  Where did 2010 go?  I hope you all had a wonderful Holiday filled with lots of family, fun, games and most important, lots of yummy food!  This recipe is for all the busy cooks out there.  It doesn't get much easier than crock-pot meals.  This pork chop recipe comes from The Hungry Housewife.  Her picture made this dish look super yummy and convinced me to make it.  My eyes make up my mind for me the majority of the time, if it looks good I will try it.  I thought these pork chops tasted pretty good.  This dish definitely gets points for being super easy.  The chop itself was really good, but the sauce had a different flavor.  It was still good, it was just a little different than I had imagined it would taste like.  I think the rice went perfect with this dish.  I almost served this over mashed potatoes, but was glad I went with the rice instead.  If you make this, DO NOT add any salt.  I didn't add any and it was still almost too salty.   

Slow Cooker Pork Chops
adapted from: The Hungry Housewife

4 thick-cut pork chops, bone in or boneless
1 can cream of chicken soup (with herbs or without)
1 pkg. dry ranch dressing mix
4 cloves garlic, minced
1/4 c. white wine (I used chicken broth)
1/4 c. chicken broth
pepper

Combine soup, dressing mix, garlic, wine and broth.  Sprinkle chops with pepper (Do Not Salt).  Place chops in slow cooker and pour soup mixture over top.  Cover and cook on high 4 hours or low 6-7 hours.  Serve over rice.  Serves: 4   
easy apple pie recipe that will rock in your house
betty crocker banana bread recipe 1970 banana nut bread paula deen
that give mcdonalds coupons and 
breakfast coupons you also can find recipe from